BREAKING NEWS

Subway Surfers

Chess Free

Temple Run

From our Blog

Showing posts with label Skype. Show all posts

Saturday, July 30, 2016

How to Transfer a File With Skype Guides

It's fun to transfer photos and images with Skype, and easy to do. Ensure to have the latest Skype version installed on your computer. Ensure that the person you are transferring a file to is actually online, so he can approve your transfer.


Steps

1. Open Skype, and click  the person's name you want to send a file to.


2. Click "+" button as shown on image for pull-down menu,


3. Click "Send File" option.


4. Browse for the file  you want to send on your computer and choose it.


5. Click "Open" button to start transferring.


6. The receiver should save the file to start downloading the file by approving it.

How to Unblock Someone on Skype Guides

If you’ve accidentally blocked someone on Skype, or no longer want to block a particular user, you can unblock that person at any time from your People list while logged into Skype.


1. Launch the Skype app on your Android device. 


2. Tap on “People.” 


3. Navigate to the person you want unblocked. Blocked users will have the block logo displayed over their profile pictures.


4. Tap and hold on the profile you want unblocked.


 5. Tap on “Unblock contact.” That particular user will no longer be blocked in Skype.
  •  Alternately, you can tap on the person’s profile, tap on the menu icon, and select “Unblock contact.”

How to Delete Messages on Skype Guides

Skype is a great way to stay in touch and meet with friends and associates around the world. Not only is it convenient (and a little fun, too!), it is also a great way to keep track of things, as all conversations are stored. Sometimes, though, you might say the wrong thing and want to take it back, or you want to completely erase your entire history.


1. Understand what messages you can delete. You have 60 minutes to delete a message after it is sent. After that, the "Remove" option goes away. You can only delete messages that you have sent.


2. Press and hold the message you want to delete with your finger. Release your finger after a moment. A menu will appear.


3. Select "Delete". You will not be asked to confirm. The message will be deleted for both you and the recipient.
  •     If there is no "Delete" option, then you have waited too long to delete the message.


4. Repeat this for each message you want to remove. 

How to Add Contact on Skype Guides

Using Skype for Android
1. Press the Menu button on your device. Tap “Add people”.  


2. Search for the person you would like to add. You can search by the person’s name, Skype username, email address, or phone number. Tap the magnifying glass symbol or press Enter on your keyboard to search.


3. Browse the search results. Once you have found the person that you want to add, tap the search result and then tap the “+” icon to add them to your contact list.

 
4. Send a request message. You have the option of customizing the contact request text. You can send the invite with the default text if you’d like. 


Using Skype for iPhone and iPad
1. Tap the People button. You will be presented with your contact lists. Select the list that you want to add the contact to.


2. Tap the “Add contact” button. This is located in the top right corner of the screen and looks like a silhouette with a “+” next to it.


3. Choose to your method. You can “Search Skype Directory”, “Save a Phone Number”, or “Import from iPhone”.

    ”Search Skype Directory” allows you to search for users by their name, Skype username, or email address. You will be presented with a list of search results after you enter your search. Tap the result that you want to add and then click the “Add Contact” button. You will be given the opportunity to customize the invitation text.
    ”Save a Phone Number” allows you to enter someone’s name and phone number and then add them to your contacts list. You can then call them using your Skype credits.
    ”Import from iPhone” allows you to import your contacts from your iPhone and add their numbers to your Skype contacts. This will only add names and phone numbers, and will not add the person as a Skype user.

How to Use Skype Guides

Skype is a free piece of communication software which uses VoIP (Voice over Internet Protocol) technology to allow users to make free video and voice calls, send instant messages and share files with other Skype users. This makes it an ideal solution to supervision of students who are not regularly in attendance on campus.

It is free and easy to download. Simply go to google Playstore to download and follow the on screen instructions. If you have not already got a Skype account you will be prompted to create one. I would advise you to untick the box asking whether you would like updates on Skype products unless this is something that really interests you. At this stage you can also choose whether you would like Skype to sign in when you start up you computer. If you are not planning on using Skype frequently I would advice you to set your preference to manually signing in.

It is completely free for you to communicate Skype-to-Skype; this includes video calls, calls and instant messaging. You can also call to landlines although you will have to credit your account as this is not free, however call rate are low and international calls are particularly good value.

What you will need:
•    Microphone (voice calling)
•    Webcam (video calling)
•    Speakers

Note: If all you want to do is send instant messages you will not need any of the above.

The welcome screen will help you to get set up and includes features which help check that the sound is working correctly and helps you to search for Skype contacts.

Tip: If you accidently close the screen go to Help → Welcome screen to retrieve it.

Once you are set up, you can start to use Skype.

Call a Skype contact
1.    Click the Contacts button at the top of Skype.

2.    In the list, find the person you want to call. Click on them. (Anyone with one of these beside them  is on Skype so it's free to call. Anyone with one of these  means it's a phone or mobile number which means you will have to have money in your account to call them).

3.    You will see their details in the main window. Click the green Call button . You should hear ringing. If you don't hear the other person or they can't hear you, click the call quality icon at the top of your call window.

To hang up, click the red End call button .

Useful things you can do on a call:
•    Mute – click this icon (microphone with X) to mute your microphone so the other person can't hear you.
•    Hold – click on this icon (Pause) to put the call on hold.

Make a video call
To make a video call make sure you've got a webcam plugged in; click the green Video call button to make it a video call.
 

 Useful things you can do on a video call:
•    Resize the screen – click and drag the corner of the video screen to make it bigger or smaller.
•    Move it around – click and drag the video of yourself around your screen.
•    Instant message (IM) at the same time – click the Show messages link at the top of the video to instant message while you're on the call.

Send instant messages (IM)
1.    In your Contacts, find the person or group you want to message. Or in your Conversations list, find the message you want to pick up again.

2.    Click on the person/group or conversation.

3.    In the main window, click in the typing box.
Type a message and click the blue send message button, or just press the Return key on your keyboard.

If someone IMs you, your Conversations button will turn orange.

1.    Click on the button.
2.    You'll see a list of conversations.
Find the IM you want to reply to and click it.
3.    In the main window, click in the typing box.
Type a message and click the blue send message button, or just press the Return key on your keyboard.

Useful things you can do in an instant message:
•    Group IM – click this button (Add people) to add more people to the conversation.
•    Save a group IM – click this button (More) to save the group in your contacts. When you need to pick up the conversation again, just click on the group instead of adding everyone in all over again

Send a file

1.    Click on Conversation → Send → File…
2.    Choose the file you want to send.

Tip: To send more than one file hold down Ctrl as you select them.

Screen sharing

To share your screen, simply call a contact and in the conversations window click ShareShare Your Screen in the IM toolbar.

You can select if you want to share your full screen or just a part of it. The person you are sharing your screen with can see your screen in full screen mode. You can continue talking via Skype whilst you share your screen.

Thursday, July 28, 2016

The Beginner's Guide to Skype

Skype, the popular Internet calling app, has been around for quite some time. The (mostly) free service launched in 2003, and has become one of the easiest and cheapest ways to stay in touch with others across the world.

Whether you're traveling internationally or want to save money when calling others, Skype has become a great option because it's accessible through computers, phones, tablets, home phones, TVs and even devices like your Xbox One. 

Ready to plunge into the Skype action? Here's a quick go-to guide for newbies.

1. Sign up.
Getting started is as easy as any other app. To open an account, visit the Skype homepage and click "Join us" in the upper right-hand corner.  
 

Choose how you want to log in. You'll see you have the choice to sign in with your existing Facebook or Microsoft account, or you can create an account just for Skype.


If you choose to connect with your Facebook account, the benefit is that you’ll be able to view your Facebook News Feed and contact your Facebook friends in Skype. This means you'll be able to share, like, comment and view updates from your Facebook friends.

On the Facebook News Feed in Skype, you can hover your mouse over your friend’s update, which will show if she is available for phone or video calling. If your friend's mobile or landline number shows, you can call her using Skype credit or a subscription (see below). If your Facebook friend also has Skype, you can call her for free by tapping "Call Skype." If no options appear, this means your friend has not registered her phone number on her Facebook profile, and that she is not your Skype contact.


The drawback to connecting Skype to your Facebook account is that you'll have to give Skype permission to access your public profile, friend list, email address, News Feed, birthday, status updates, check-ins, hometown, current city, photos, videos, website and personal description. You’re also allowing Skype to gain access to your friends' information.

You can always connect your Facebook account at a later date. If you’re a Mac user, go to "Skype Home," click on the grey gear symbol and choose "Connect to Facebook." If you’re a Windows user, go to the "Contacts" tab, scroll down to "All," and select "Facebook."

Once you decide how you want to log in to Skype, enter your information in the required fields, and you're ready for the next step.

2. Download Skype. 
After setting up your account, you may be asked if you would like to buy Skype credits, which are used to make phone calls to mobile phones or landlines. Remember, calling other Skype users is always free, but calling phones and landlines costs money. If you’re not sure you want to purchase credit, skip this for now — we’ll come back to it in the sixth step.

Now, go ahead and download Skype:

For Mac users: Save the Skype file to your computer. Double-click the download file and drag the Skype icon to your Application folder. Then, open Skype from your Application folder and log in with your Skype name and password.

For Windows users: Save the Skype Setup Application to your computer. Double-click the Skype Setup file and follow the steps to install. Launch the Skype application and sign in with your Skype name and password.

If it's your first time logging in, you may be asked to customize your settings, such as your language preference, and if you want Skype to launch when your computer starts. If so, check off "Run Skype when the computer starts."

You'll also be asked if you want to install the feature "Click to Call," which is handy for when you want to call phone numbers listed on websites. Numbers across the web will be marked "free" if local businesses partners have decided to pick up the cost of your calls. This is especially useful when you're browsing the web and want to make a free call to a business. 


Once you've completed this section, Skype will take a few minutes to install.  

3. Check your audio and video settings.


Next, you'll need to check if your audio and video equipment is working. If you skip over this step now, don't worry — here's how to adjust and check your settings at any time:

For Mac users: Click "Skype" at the upper left-hand corner and scroll down to "Preferences." Then click on the "Audio/Video" button.

For Windows users: Go to "Call" and click "Audio settings." Below it, you’ll see "Video settings."

Once you're in the settings page, here’s what to check for:
  • Make sure your speakers are on. If you can hear the Skype jingle, you're good.
  • Check that your voice can be heard through the microphone. If not, choose the appropriate microphone from the drop-down menu.
  • Check to see if your webcam is connected. If so, you should be able to see yourself on the live video feed. If not, check your video settings and make sure your webcam is plugged in correctly.

4. Set up your profile.

Profile settings
When setting up your account, you may have already been asked if you would like to change your profile picture. To change this and more, click on your name on the upper left-hand corner and all your profile settings will appear. You can edit your phone numbers, email addresses, country, state, gender, birthday, and add a blurb about yourself in "About Me."

You can add as little or as much information as you want. The column on the right will display "Public" (information everyone using Skype can view), "Contacts only" (information your contacts can only see), or "Private" (visible to only you) for each field. If these words are grayed out, they're disabled, which means you cannot change the privacy setting.

You’ll have to choose what information you want to share based on that privacy setting. For example, your country and state are public. If you aren't comfortable with sharing this information, it’s best to leave it blank. 

 
Setting your mood

You’ll notice that Skype has an "Add a mood message" option in your profile settings. The mood is a short message you can add to your profile to let your friends and family know what you’re up to or what you’re thinking. Similar to a status, you can post a comment, quote, a web link and more. 


Setting your status

You have the option to set your status to let your Skype friends know if you are available to chat. You can choose a status (online, away, not disturbed, invisible or offline) to show up next to your name.

For Mac users: Go to "File" and "Change Status."

For Windows users: Click "Skype" on the left-hand side of menu bar and select "Online Status."


5. Set general and privacy settings.

For Mac users:
Go to "Skype" at the upper left-hand corner and select "Preferences." You’ll see your settings along the top.

For Windows users: Go to "Skype" at the upper left-hand corner of the menu bar and select "Privacy." You’ll see a list of settings based on category on the left-hand side of the menu.

Under "General" you can choose if you want to double-click on a contact to start a call, enable Skype to launch when your computer starts and more.

To save yourself from dealing with unwanted calls and IMs, take a look at your privacy settings by selecting "Privacy."
Here, you can choose who can call and IM you, who can send videos and share screens with you, who can see your online status, and how long you want your chat history to stay. If you don’t want your profile details to be shared with advertisers, do not check off "Allow Microsoft targeted ads, including use of Skype profile age and gender." You can also manage your blocked people under "Block contacts."

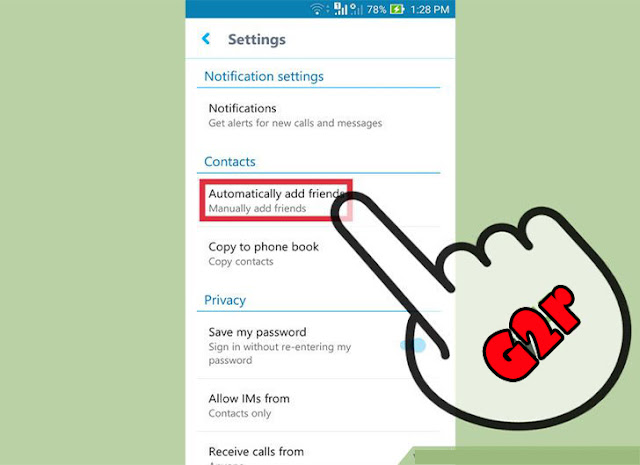
Then take a look at "Notifications" to choose which Skype alerts you want to receive. After this, you can adjust settings in the "Calls," "Messaging" (called "IM & SMS" on Windows) and "Advanced" sections to further customize your Skype experience. 

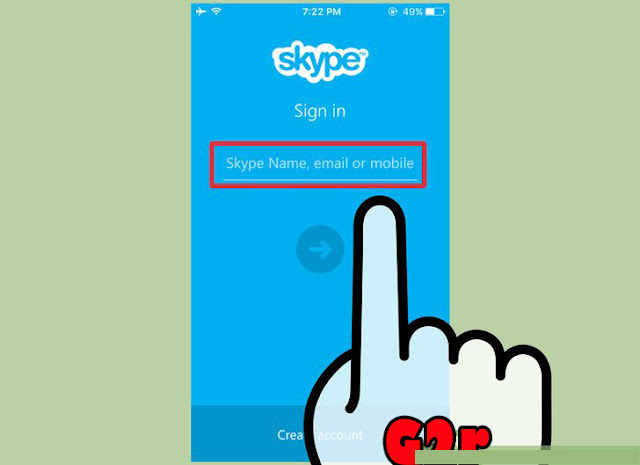
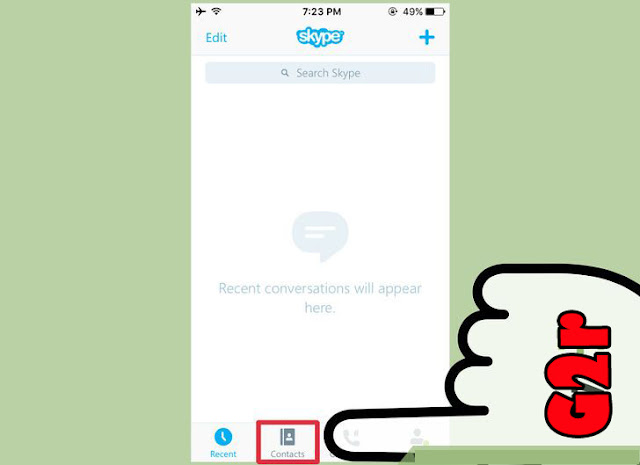
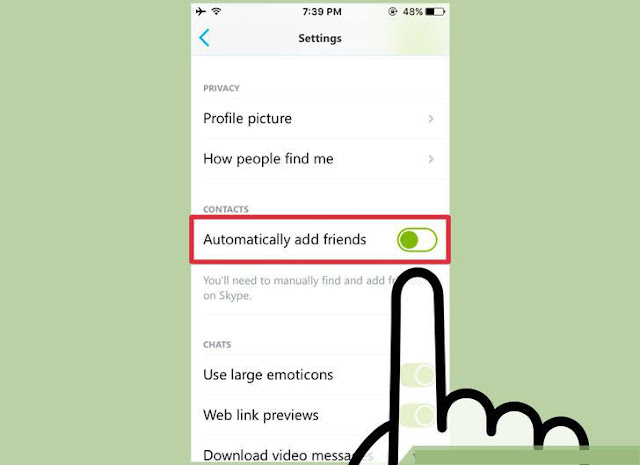
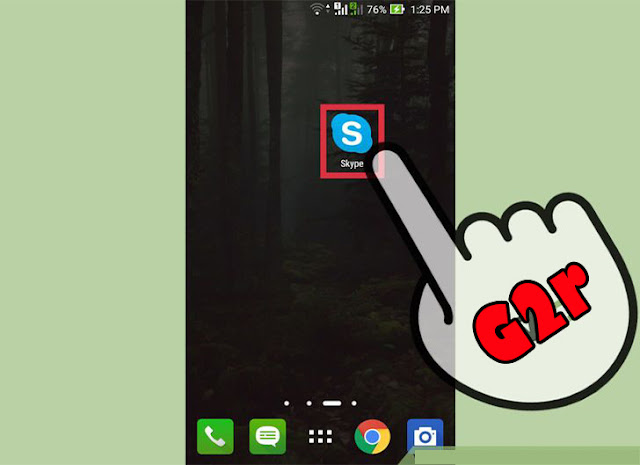
6. Add your contacts.

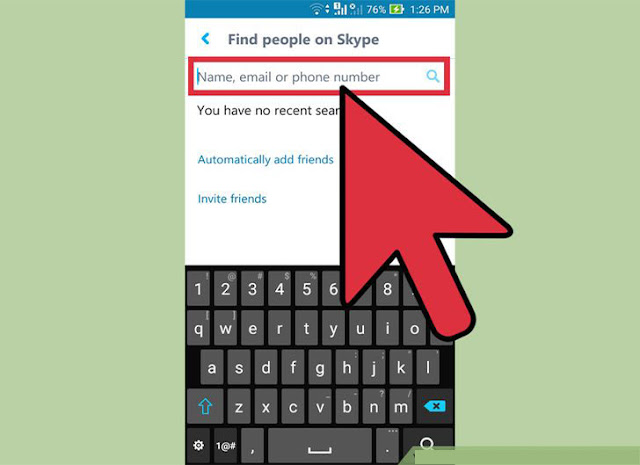
Once you're in the Skype app, you'll see "Find your friends and say hello." You can search for your Skype contacts in your address book by selecting "Search address book."  

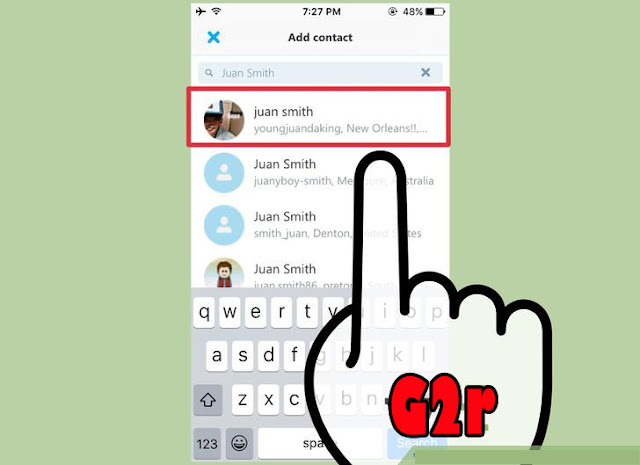
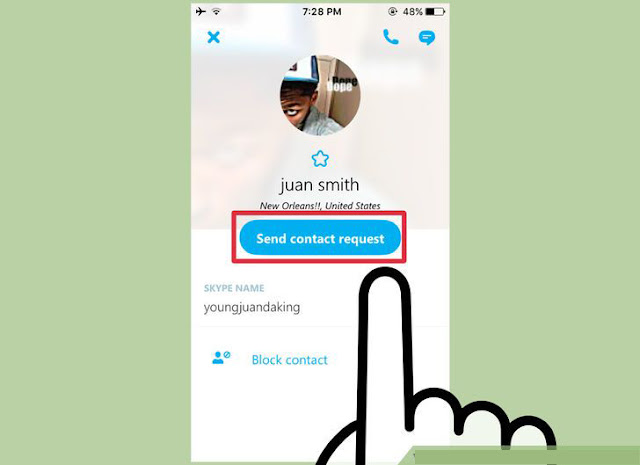
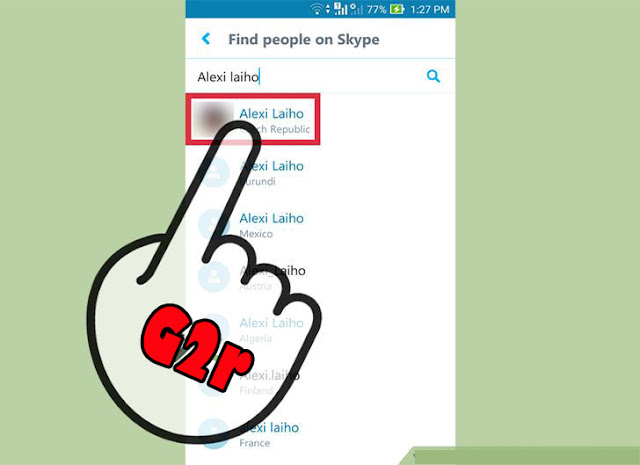
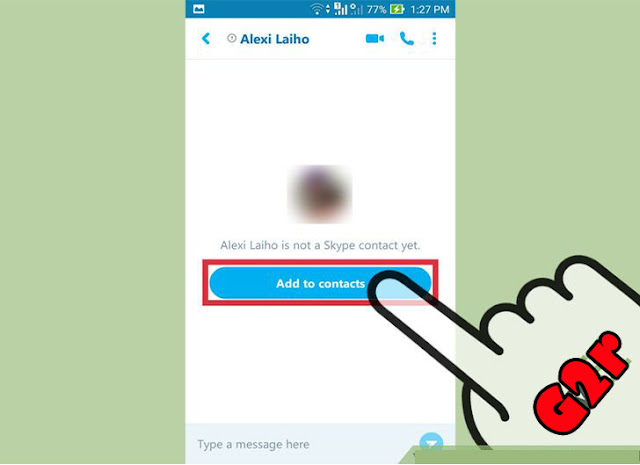
If you prefer to add Skype contacts manually, tap the "Add Contacts" button and enter your contact's name, Skype name or email address. Select the contact from the list of results that appear, and tap "Add to Contacts." You can edit the default contact request message, and click "Send."

Those who accept your request will appear in your Contacts List. If there is a green check mark next to your contact's name, this means your contact is online and available.

7. Message, call and video chat family and friends.

MessagingTo send and receive instant messages, click on a contact in your list and type in the text field where your cursor is.
One of the advantages of Skype chat is that you can share photos, videos and files free of charge. Best of all, there is no size limit or limit to the number of files you can send or receive through Skype.

To send a file, click the chat you want to send the file to, click the + button and select "Send file…" Then, browse and choose the file you want to send. Click "Open" and the files should be sent to the recipients in the chat. You can also just go to your contact list and right-click the person to whom you want to send a file.

Skype recommends using an up-to-date antivirus software to scan files that are sent to you. To protect privacy, Skype says on its site that all files are "encrypted end-to-end just like Skype-to-Skype calls."
Skype to Skype calls

To place a call, click the "Call Phone" button next to your contact's name.

To video chat on a Mac computer, hover over your contact’s profile picture and "Video Call" should appear. You and your recipient will need to have a webcam in order for you to see each other.

To video chat on a Windows computer, click on the "Video Call" button, which is located to the left of the call button.


Calls to mobile phones and landlines

If you're calling a mobile phone or landline, it will cost money. The price of the call varies depending on where you call. You have two options: to purchase Skype credit or buy a calling subscription. Call rates are always the same, no matter where you're calling from.

To manage your Skype credit balance, sign into Skype and tap your name in the upper left-hand corner of your home screen. If you have Skype credit, you’ll see the remaining balance next to your name. When you click on your name, it takes you to your profile settings, where you can purchase additional Skype credit or a subscription.


In your profile settings, you will also see the choice to upgrade to a Premium account. Group video calling, which used to be the highlight of Skype Premium, is now free for all Skype users. Due to this, Skype Premium has been removed and is undergoing changes.


8. Other Skype features.

With Skype, you can also...
  • Make group calls with up to 25 people: If you’re calling people who are on a mobile or landline, remember you’ll need Skype credit or a subscription.
  • For Mac users: Go to "File," "New Conversation" and click the + button to add people to the group call.
  • For Windows users: Select the "Create a Group" button and then click on a contact you want to add to the group and drag it to where you see "Drag contacts that you want to add here."You can also click the + button and select "Add people."
  • Get a Skype number: You can purchase a Skype phone number by selecting "Skype Number" under the "Manage Features" section.
  • Forward your calls to any phone: Have your calls forwarded to a mobile or landline of your choice at per minute rates, pay through Skype credit or have it covered by a Skype subscription. You can set this up by selecting "Call forwarding" under the "Manage Features" section.
  • Set up a free caller ID: Get rid of your unknown number so people know you're calling them. Select "Caller ID" under the "Manage Features" section.
  • Make group video calls:

          For Mac users: Go to "File," "New Conversation" and click the + button to add people to the group video call. To place the call, click "Video call."

          For Windows users: Select the Create a Group button and then click on a contact you want to add to the group. Then, drag it to where you see "Drag contacts that you want to add here." You can also click the + button and select "Add people."
  • Send SMS texts: You can send SMS text messages to mobile phones that allow texting, or to a Skype contact who has his or her number listed. You’ll need to purchase Skype credit for this. To send an SMS, simply right-click on the contact and select "Send SMS Message." When it’s delivered, you’ll see the message "SMS: Delivered."
  • Receive voice messages: Set up a free voicemail service so you never have to worry about missing a call. Select "Voice messages" under the "Manage Features" section.
  • Start a GroupMe chat on your mobile phone: To start a GroupMe chat, you will have to download the GroupMe app.
  • Screen share with an individual or group: To share your screen, open up the conversation with one of your contacts. Click the + button and select "Share screens…" The other person (or people, if it’s a group) will then see what’s on your screen.
  • Send contacts: During an IM conversation, you can send contact details to your friends. Click the + button and select "Send contacts." Then, check the contacts you want to send to the conversation and click "Send." If you want to send contact details during a video call, instead of "Send" there will be an "Add to call" button.
  • Set up a Skype To Go number: The Skype To Go feature gives you numbers to call your contacts abroad from any mobile or landline, so you can avoid international charges. You can set this up by selecting "Skype To Go" under the "Manage Features" section.

Wednesday, July 27, 2016

How to Share Screen on Skype

Share Screen with Skype has become now much simpler. No need to record the screen You and then send them because now You can share screen in real time. But You may not know how to share the screen with friends and also You may have some questions and problems in Your mind so here I am to give answers to questions.

To share the screen, You just need to skype, no software extra other takes. Clarity of the screen has always fascinated except if You have an internet connection it's very slow. Now let's go back to the steps to share the screen. Follow the steps mentioned below to share the screen with friends.

Follow the Step :
1. Log into the Your Skype account using PC and open the contact. 
2. Now Video Call Your friends with whom You want to share the screen.
3. If contact take Your call, You will see some buttons on the screen. Click on plus blue button.
4. Now You will see a button with screen text Share. Click it.
5. Now You will start to see  Your desktop screen as preview up. Now You can share every window and location that open or just the desktop. This will be given a name as pass it down the Window and Share the desktop. Click on one of these.
6. Now Your friend will be able to see Your screens. Congratulations, You just share Your desktop screen to Your friend for free cost.

Tuesday, July 19, 2016

How to Invite Someone on Skype - Guides

To invite someone to be your Skype contact, you’ll need to know either their username, their real name, or their email address. If you’re using an iPhone or Android device, you’ll have the option to have Skype search your personal contacts. If you’re ready to use Skype for phone calls, video and/or live text chat, learn how invite your friends, family and colleagues to your contacts list.


Method 1
Using an iPhone

1. Sign into the Skype app. If you’re not already signed into the app, enter your username and password when prompted.


2. Tap the Contacts icon. This icon appears the bottom of the screen.


3. Tap the “New Contact” icon. This icon is at the top right of the Contacts screen, signified by a person with a plus (+) sign.


4. Type a name, phone number or email address into the search bar. As you type, Skype will search through your current iPhone contacts. It will also display a link that says “Tap to find new contacts.”


5. Select “Tap to find new contacts.” This will search Skype’s user base for the information you entered. If you can’t find the right person by name, search by email, if not by email, phone, and so on. 


 6.  Choose the user you want to add from the list. Tap the user’s icon or name to launch his or her contact request screen.


7. Tap “edit” to change the contact request text, if you desire. The standard text is: Hi, I’d like to add you on Skype, but it can be edited to include your own personal touch. You can delete the entire message or simply add a few words to the original.


8. Tap “Send Contact Request.” The recipient of the request will see a message in their Skype dashboard indicating that you’ve asked them to become a contact. Once that user accepts your request, you’ll be able to interact with them. Until then, your new contact will have a question mark (?) next to their name.


9. Navigate to My Info > Settings to enable Automatically Add Friends. This step is optional, but can be useful if you want Skype to automatically search your iPhone contacts for Skype users.


Method 2
Using Android


1. Launch the Skype app. Sign in with your username and password when prompted.


2. Tap the Contacts icon. The icon looks like an address book and appears at the top of the screen. Once you tap this icon, you’ll be brought to your list of Skype contacts.


 3.  Tap the “Add Contacts” icon at the bottom right of the contacts list. This will bring you to a search box.


4. Enter a name, phone number or email address into the box, then tap the magnifying glass. Now Skype will search for a user who matches this information. If nobody is found by phone number, try email address. Cycle through these search strings until your contact is found.


5. Select your contact from the search results. On the resulting screen, you’ll have the ability to type a unique message to this user. They’ll see this message on their screen when they receive your contact request from Skype.


6.  Tap “Add to Contacts.” The user has been added to your contacts and your message has been sent. The user will appear as “offline” until they accept your contact request. You won’t be able to call or chat with this user until they’ve accepted your request.


7.  Tap the menu icon, then browse to Settings > Automatically Add Friends. Only perform this step if you want Skype to add your Android contacts (who have Skype accounts) to your Skype contacts list. Once you’ve browsed to this menu, fill in the radio button next to “Automatically Add Friends,” then tap OK.
  • Like manually adding contacts, contacts which are added automatically will still need to approve the request.
  • Once these new contacts approve your request, you’ll be communicate with them via Skype.

 
Copyright © 2013 Android App Guides
Distributed By Free Premium Themes. Powered byBlogger